The quick & easy guide on how to grout mosaic tiles
Mosaic tiles are a great way to add beauty and colour to any room. However, many people struggle with grouting mosaic tiles. Grout is needed to hold the tiles in place and protect them from damage. Fortunately, with the right techniques and tools, anyone can master the process of grouting mosaic tiles.

Why do we grout tiles?
Tile grout is a type of cement-based material used to fill in the gaps between tiles. The grout is usually made from a mixture of sand, water, and cement, and can come in a variety of colours.
It helps to keep tiles in place and provide an attractive finish to any tiling project. It also helps to protect the tiles from moisture and dirt. Grouting can be done with either sanded or non-sanded grout, depending on the size of your tile joints.
What happens if you don’t grout tiles?
If you don’t grout your tiles, the tiles may become loose over time and can easily be damaged. Without grout, there is nothing to hold the tiles in place, and they can shift or crack. This can lead to water damage, mould growth, and other issues. Without grout, dirt and debris can accumulate between the tiles, which can make them difficult to clean.
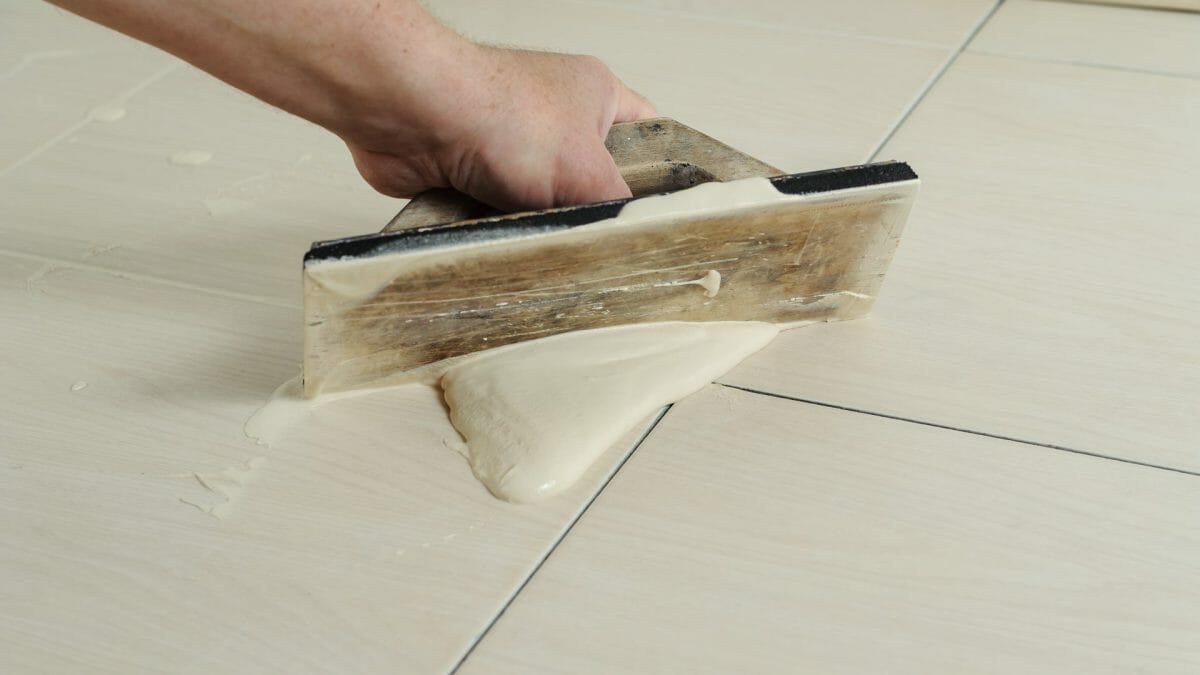
How to grout mosaic tiles?
Grouting mosaic tiles isn’t always an easy process – but if done correctly with patience and care, it can provide lasting protection and aesthetic appeal to any project. By following these tips, you’ll be able to know how to grout mosaic tiles for any current or upcoming tile projects.
1. Ensure you have the right equipment
You’re only as good as your tools! Before you can begin, make sure you have suitable equipment to hand. The type of tools you may need can vary depending on the type and size of your tile project. Some of the tools you will need include:
- A rubber float
- Grout sponge
- Grout sealer
- Bucket and mixing paddle
- Tape measure
- Level
2. Choose The Right Grout:
Choosing the right grout is essential to ensure your mosaic tiles are properly secured and protected. When selecting a grout, consider the size of your tiles, as well as the colour of your tiles. For small joints, use a non-sanded grout for a smooth finish. For larger tiles, use sanded grout for added strength and stability.
Our Kerakoll Fugabella Colour Grout provides superior flexibility and hardness, Suitable for wet areas such as bathrooms and swimming pools. This type of grout comes in a collection of 50 colours, you can also choose from a variety of colours to match your mosaic tiles.

3. Prepare the Room
Before you can start grouting, you need to make sure you have a flat surface that’s clean and dry. Use a damp cloth to remove any dirt or debris from the tiles. Any dust or debris will interfere with proper adhesive bonding, so be sure to clean thoroughly and wipe away any excess moisture before you start. If there are any gaps between the tiles, fill them with a suitable filler before you begin grouting.
3. Pre-Mix Your Grout
Make sure your grout is mixed correctly by following the manufacturer’s instructions. You can test it first on a scrap piece of tile or cardboard before applying it to your project. The mixture should be easy to spread, but not runny or too thick according to your particular needs.
Apply the grout using a rubber float, apply the grout in a circular motion to fill in all of the gaps between the tiles. Make sure to press it firmly into place and remove any excess grout with a damp sponge.
4. Apply Evenly
Once mixed properly, apply an even layer of grout in small sections at a time using a rubber trowel or plastic float tool along each row of tiles, starting at one end and working your way towards another corner. Spread the grout until all areas have been covered evenly.

5. Allow Time to Set
Once you have finished grouting, allow it time to dry before walking on it or adding any additional decorations. This can take anywhere from 24-48 hours, depending on the type of grout used and the humidity in the room.
6. Clean Up
The final step in this guide is an important one, as it ensures that your mosaic installation will be a success. Polish off any remaining haze with a dry cloth or towel. This step is important to ensure that the finished product looks as good as possible, and that all of the pieces are securely in place.
It also helps to protect the surface from dirt and dust, which can accumulate over time. With these steps completed, you can rest assured that your mosaic installation will be a success!
How Much Grout Do I Need?
When determining the amount of grout needed for your project, it is important to take into account the size and shape of your tiles. Generally speaking, you will need approximately one pound of grout per square foot of tile. However, this can vary depending on the size and shape of your tiles. To ensure you have enough grout for your project, it is best to purchase a little extra just in case.
Now that you know how to grout mosaic tiles, check out our own range of tiles. Our collection includes a variety of tile colours and designs, which make an ideal match for your home. Check out the latest tile trends for a fresh and unique look.


